2. Grasshopper Mode#
2.1. Prerequisites#
UgCS desktop version 5.17.0 or newer.
SkyHub/UgCS-CPM version 4.4.3 or newer.
UgCS Companion 1.11.1 or newer.
Note
Starting from UgCS-CPM version 4.4.3, standalone grasshopper widget and configuration is removed from the CPM software.
2.2. Hop action#

Hop action icon within UgCS software#
The Hop action is designed to streamline the creation of the Grasshopper workflow.
The Grasshopper workflow allows the UAV to perform precise, point-based descents to a predefined height for data collection before returning to its flight altitude. This mode is particularly useful for measurements requiring direct proximity to the surface, such as water sampling, echo sounding, or specific geophysical readings.
When applied to the appropriate segment, it creates a series of waypoints at which the drone descends, waits (optional) and ascends back to the general flight altitude.
Note
Hop action is available for the Area scan, Corridor Mapping, LiDAR Corridor and Waypoint segments. This action can only be used in combination with the SkyHub on-board computer; therefore, the segment altitude mode should be set to Rangefinder
2.3. Mission planning#
Start with the Area scan tool, and mark the boundaries of the area you wish to scan using the grasshopper mode.
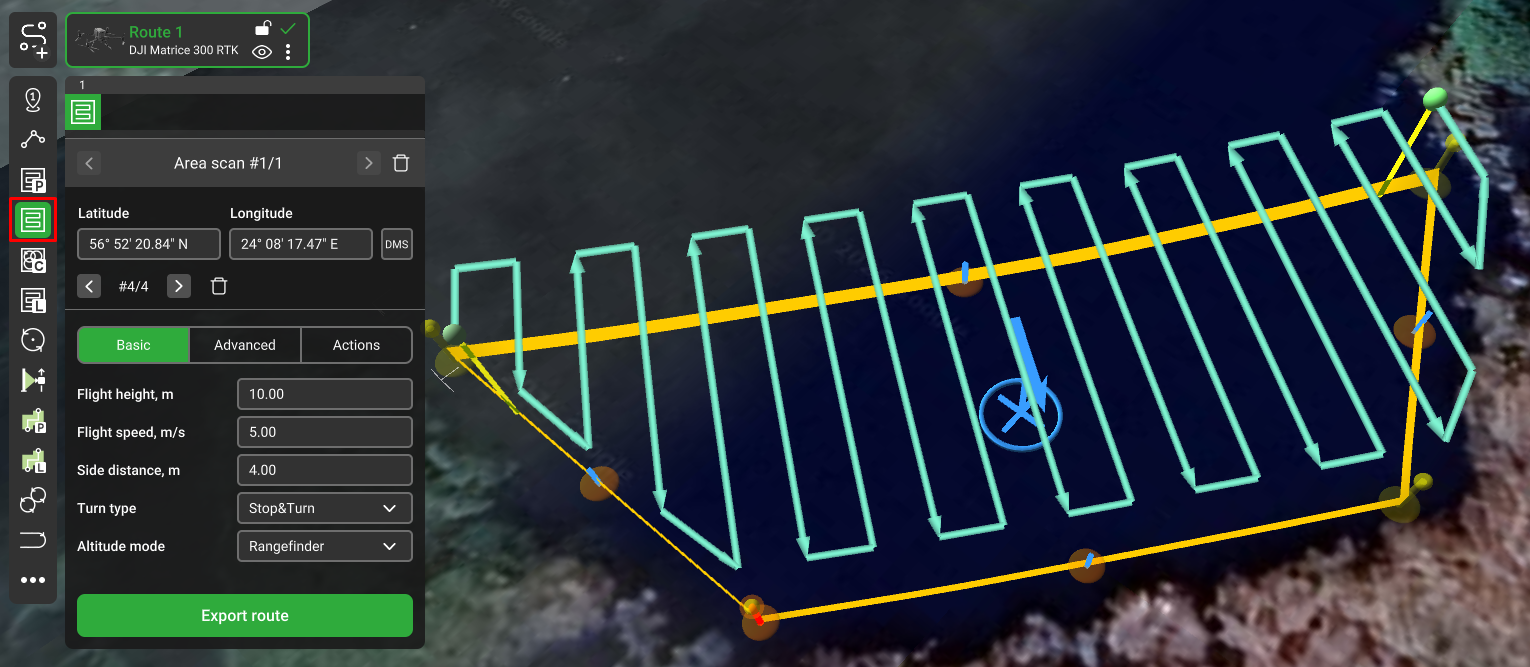
Area scan action within UgCS software#
When the area is marked, click on the Actions and add the Hop action.
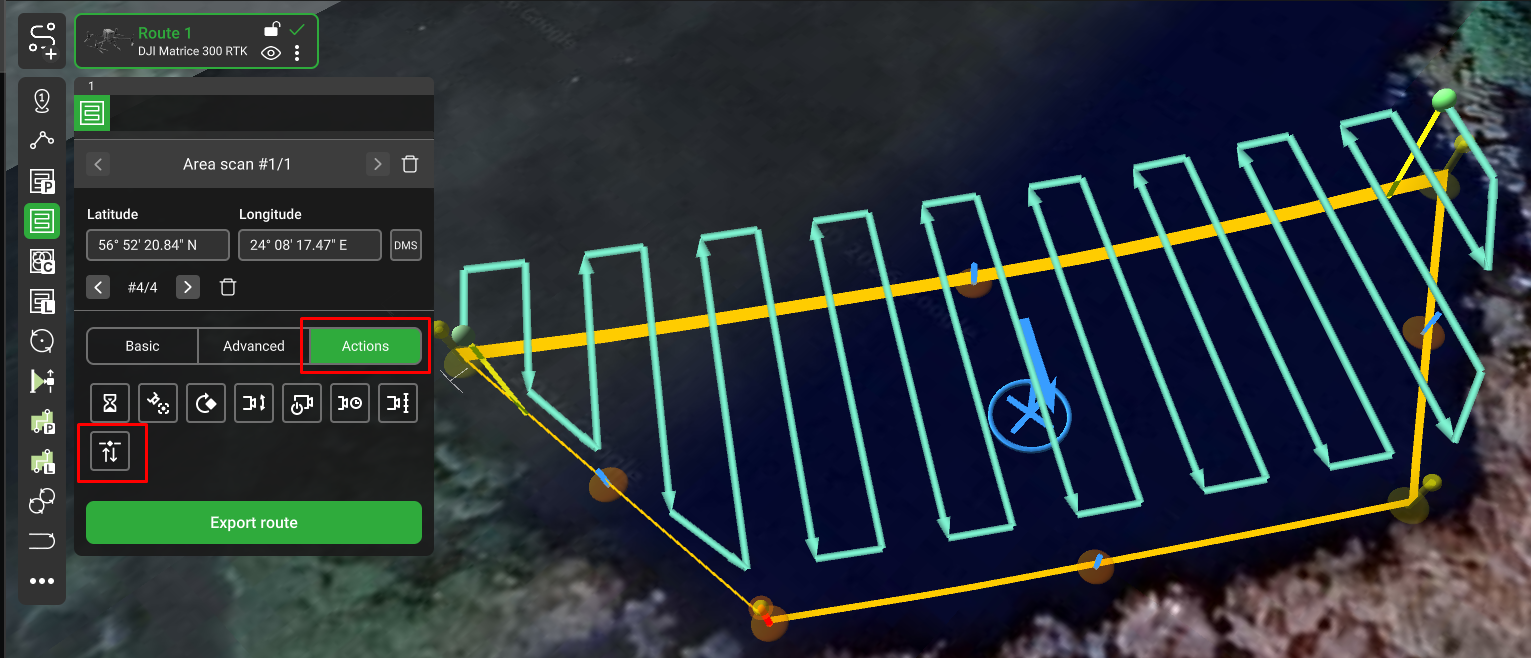
Hop action select from the Actions tab#
The Hop action has the following parameters:
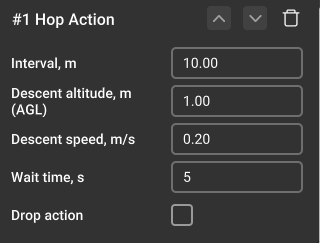
Hop action parameters within the UgCS software#
Interval - adds waypoints at the specified distance. If the interval isn’t set and additional waypoints are not generated, the action is applied only to the turning waypoints.
Descent altitude - the descent altitude over surface.
Descent speed - speed at which the drone descends.
Wait time - the pause time at the descent position.
Drop action - adds a drop action at the descent position for the supported payloads. If the Drop action is enabled, it will be performed in the middle of the specified “Wait Time”. The timer does not pause for the duration of the Drop action.
Warning
By default, descent speed is taken from the SkyHub configuration and cannot be higher than 1m/s. If necessary, descent speed can be adjusted only to the lower value.
Grasshopper route is ready.
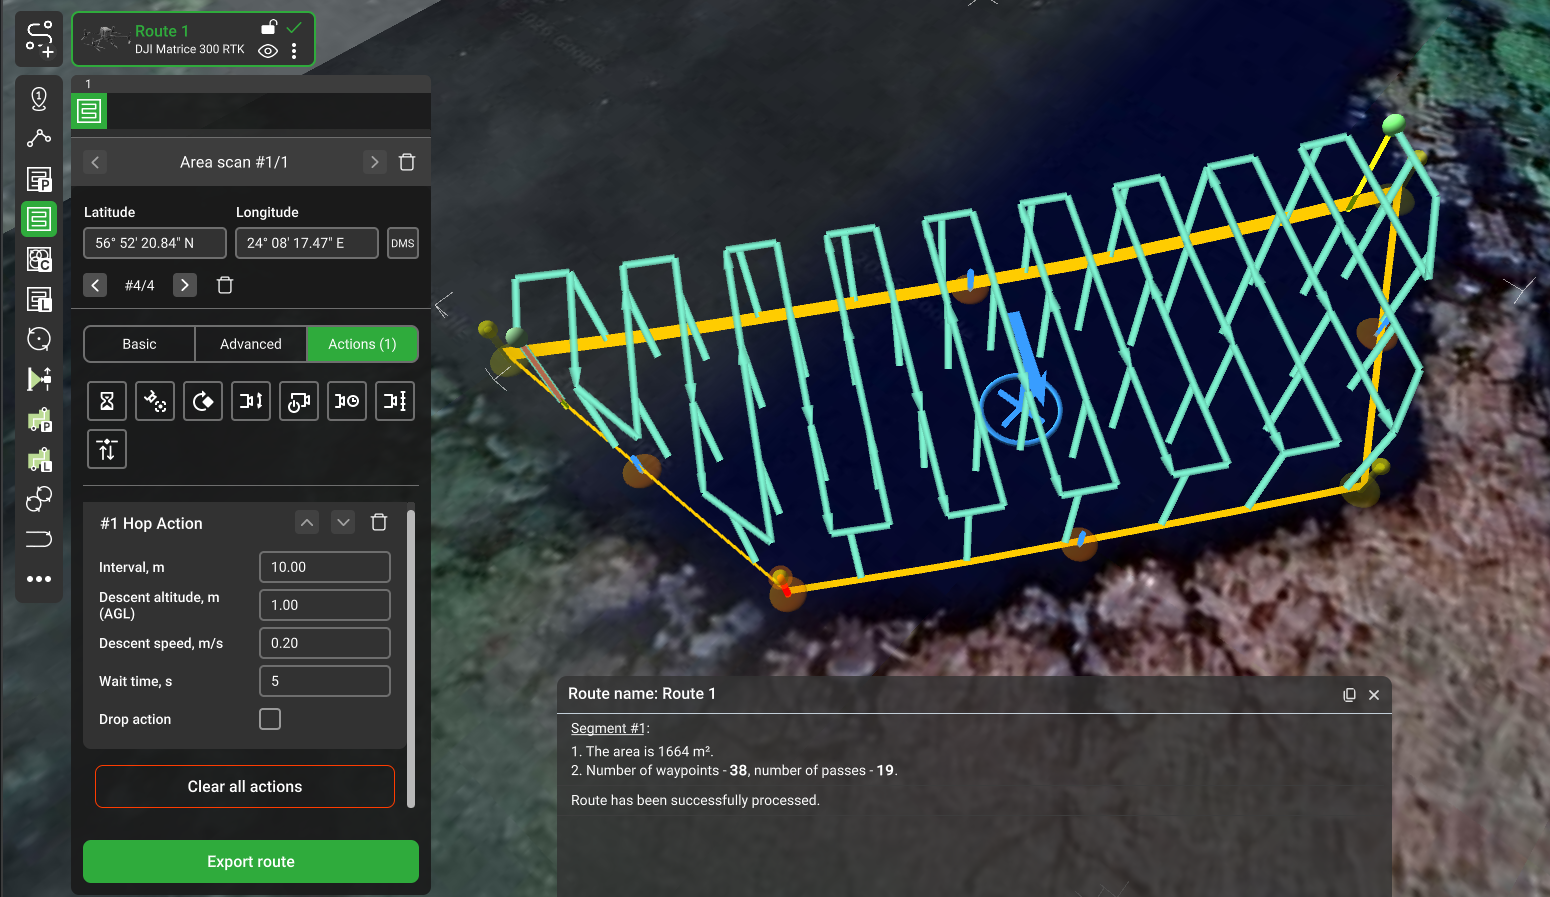
Grasshopper route is ready#
2.4. Drop action#

Drop action icon within UgCS software#
The Drop action is primarily designed for the Water Sampling surveys. When added to a separate waypoint, it forces the Water Sampler to open at such a waypoint.
Note
Drop action can only be used in combination with the SkyHub on-board computer; therefore, the waypoint altitude mode should be set to Rangefinder.
The rest of the Drop action parameters should be configured in Custom Payload Monitor and are described in the Drop Messenger section.
2.5. Flight process#
Grasshopper mission execution is the same as any regular SkyHub rangefinder mission.
Upload the mission to the drone, either from the UgCS desktop or Companion app on your remote controller.
Manually arm the drone and perform a manual takeoff.
Move the drone towards the start of the mission.
Activate terrain-following.
Note
Once terrain following is active, first thing the drone will do is ascent/descent to match the target altitude, and then will move towards the 1st waypoint with the target altitude.
Warning
Activate terrain following only if there are no obstacles in the line of flight to the first waypoint.
Based on the interval you select, there will be created additional waypoints (stop-points) along the route, representing the spots where the drone will stop and descent for the data collection.
When the drone reaches the stop-point, it will descent to the descent altitude value and collect the data for the duration you set in the wait time field.
After the data is collected, the drone will ascend back to the target altitude, move to the next stop-point and repeat the process.
After the mission is complete, the drone will stop at the last waypoint, then climbs to the Safe altitude value defined in the UgCS-CPM software.
Manually return the drone to the desired landing position, and perform manual landing.
Download the flight results (see Log Files Management).